前言
本文包括基本的VS Code安装、C++环境配置以及OpenCV配置全过程,以及如何解决在配置过程中会遇到的问题。
一、资源的下载和安装
1、VS Code
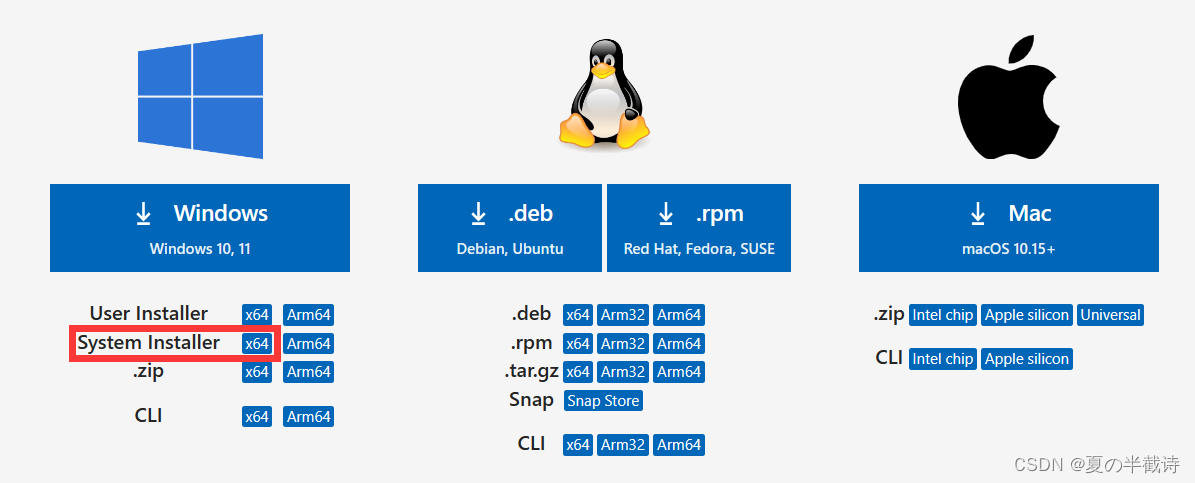
(1)VS Code下载
官网下载:Visual Studio Code

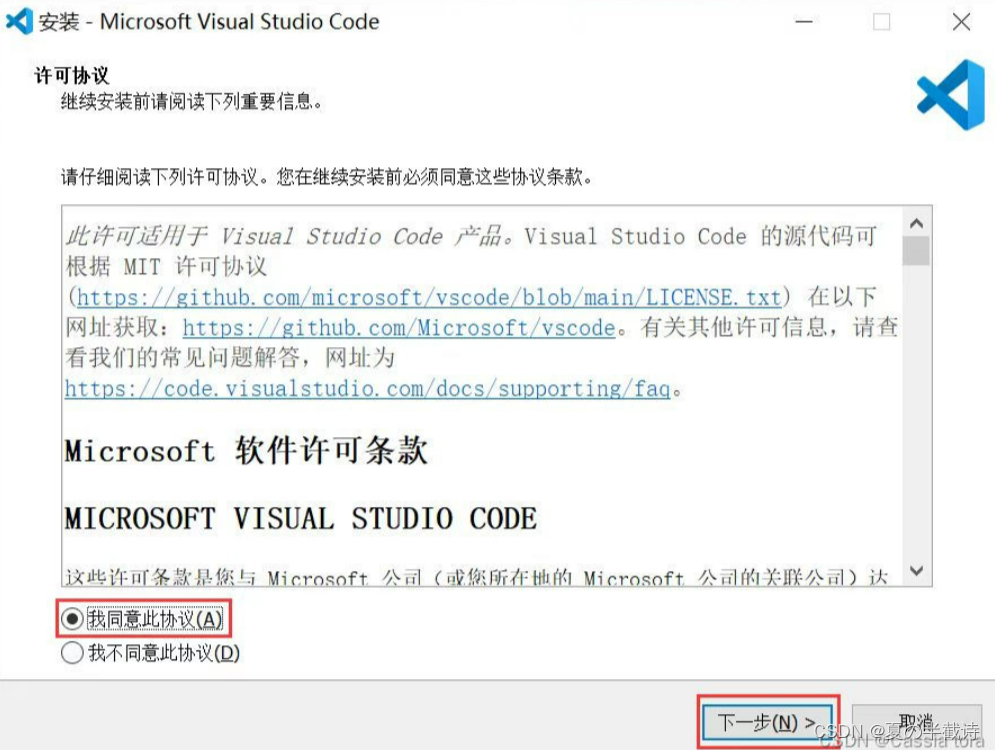
(2)VS Code安装
双击.exe文件开始安装,同意此协议,点击下一步:
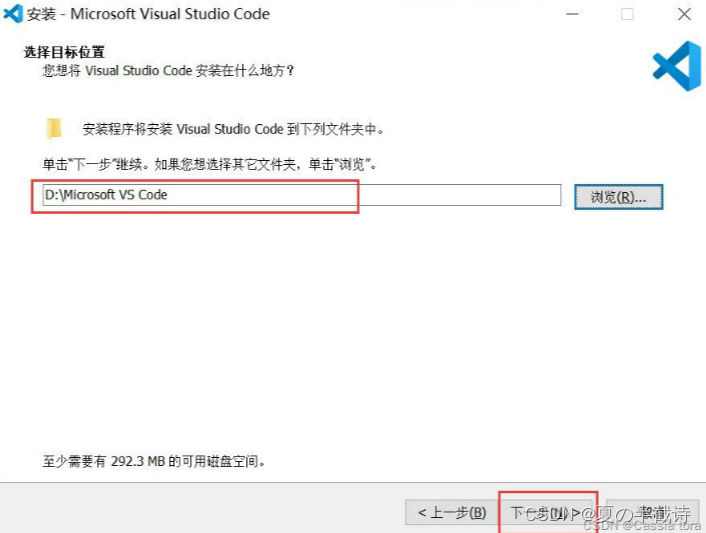
选择安装路径,点击下一步:
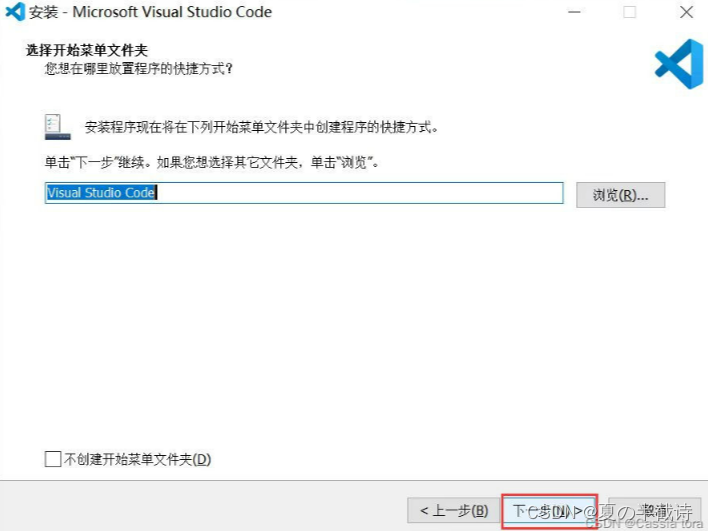
点击下一步:
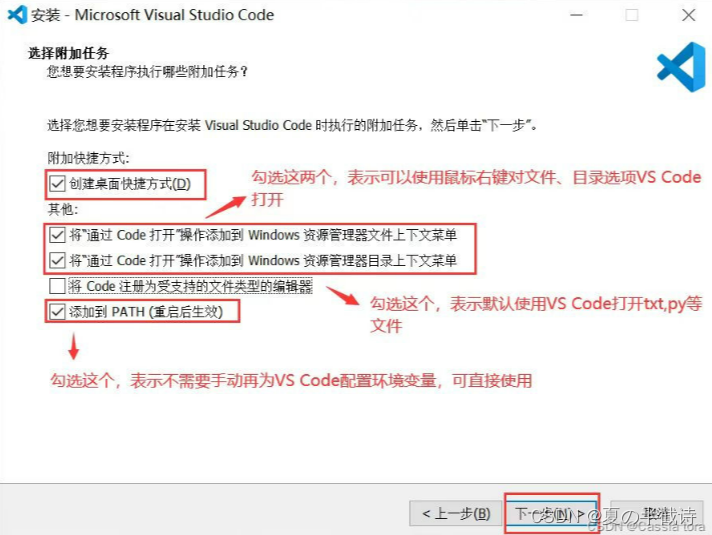
根据图中提示勾选,点击下一步:
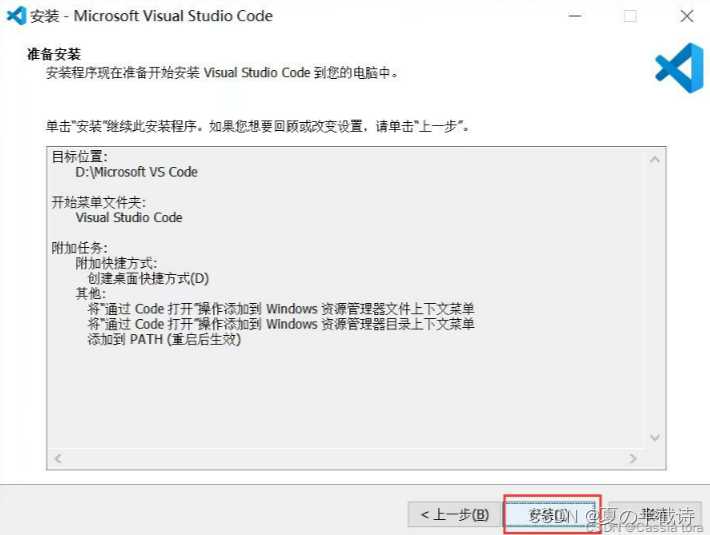
点击安装:
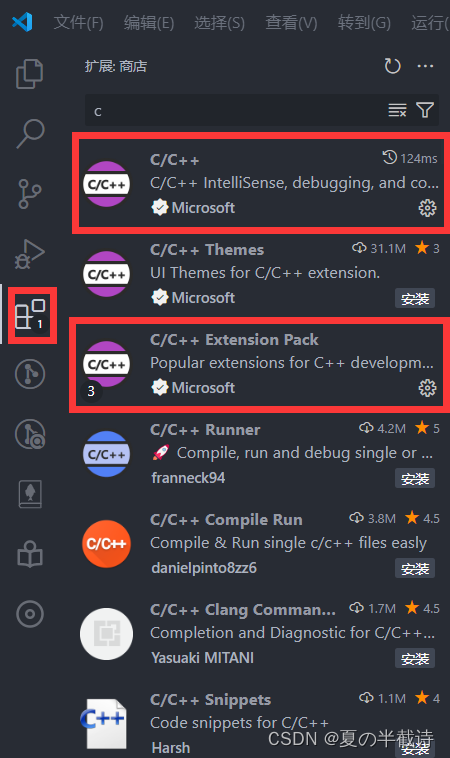
安装扩展:
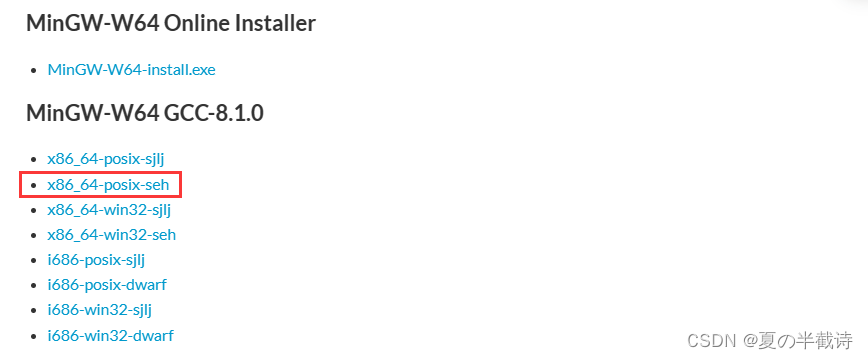
2、MinGW-w64
官网下载:MinGW-w64离线包下载地址
3、CMake
官网下载:CMake
4、OpenCV
官网下载:OpenCV
二、环境配置
1、VS Code
安装完后,可以在环境变量的用户变量的Path里查看到VS Code,说明配置完成
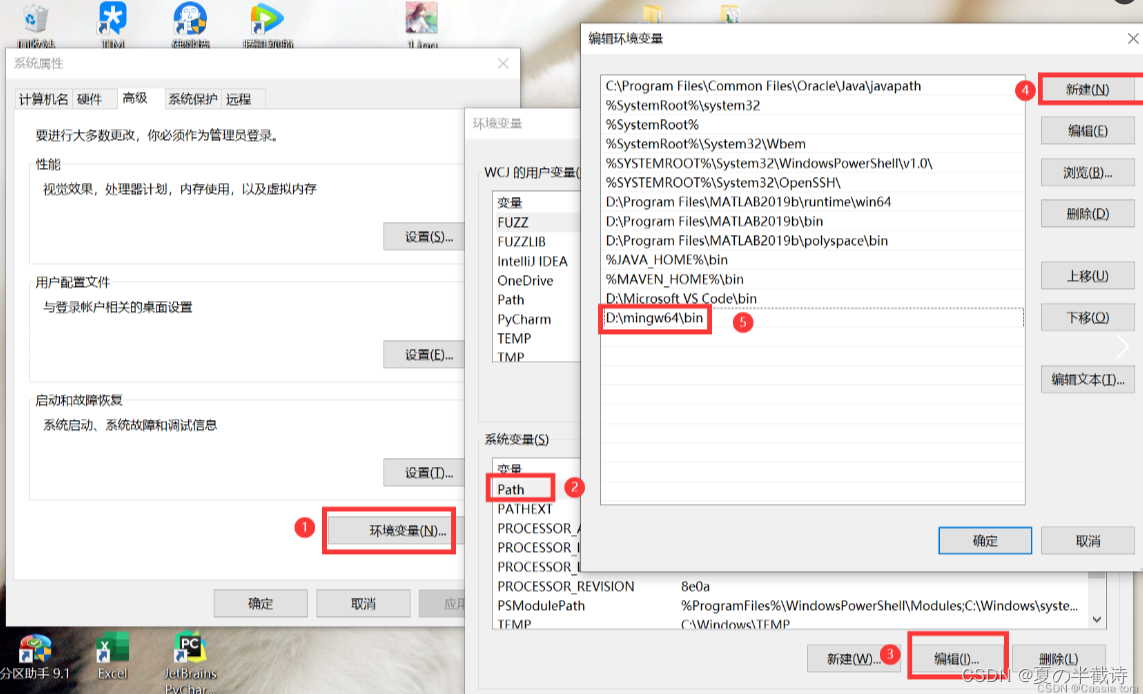
2、MinGW-w64
解压MinGW-w64压缩包,将该文件夹的bin路径添加到环境变量的系统变量中:
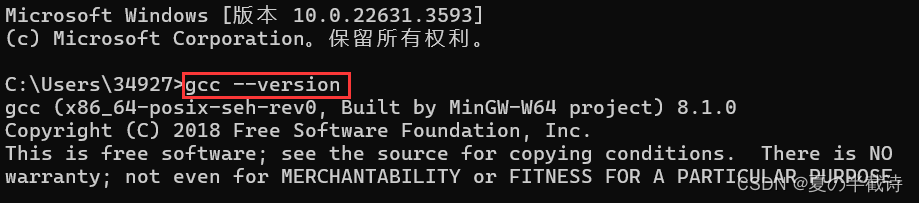
Win+R,cmd调出控制台,检查MinGW-w64是否安装成功,若成功则如下图所示:
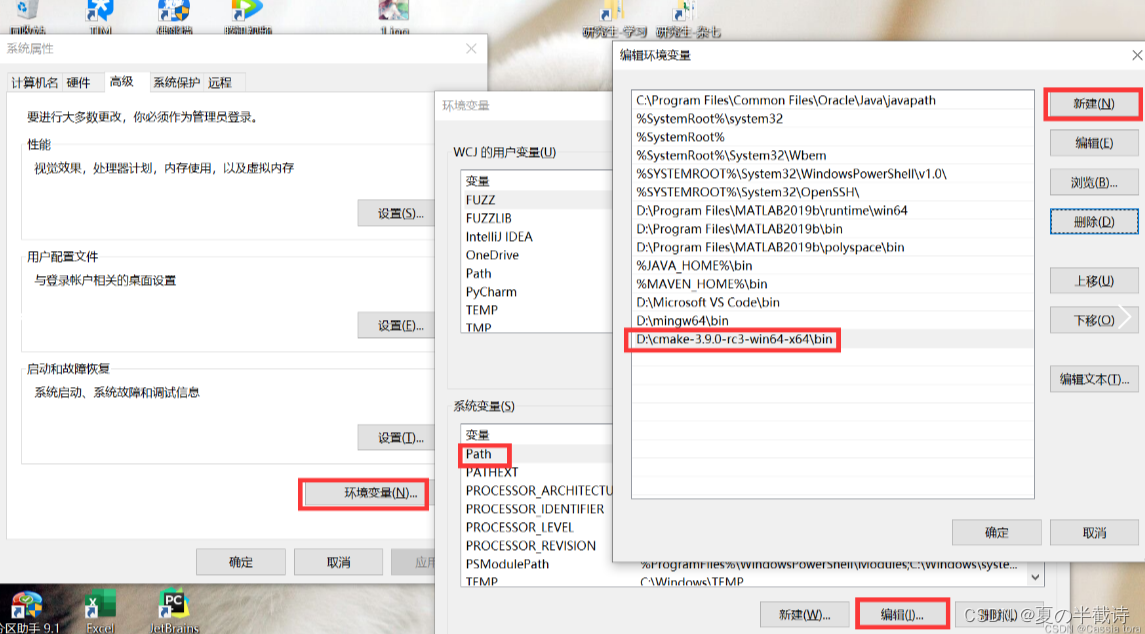
3、CMake
将CMake安装包解压,文件夹如图所示:
将该文件夹下的bin文件路径添加到环境变量的系统变量中:
Win+R,cmd调出控制台,检查CMake是否安装成功,若成功则如下图所示:
4、OpenCV
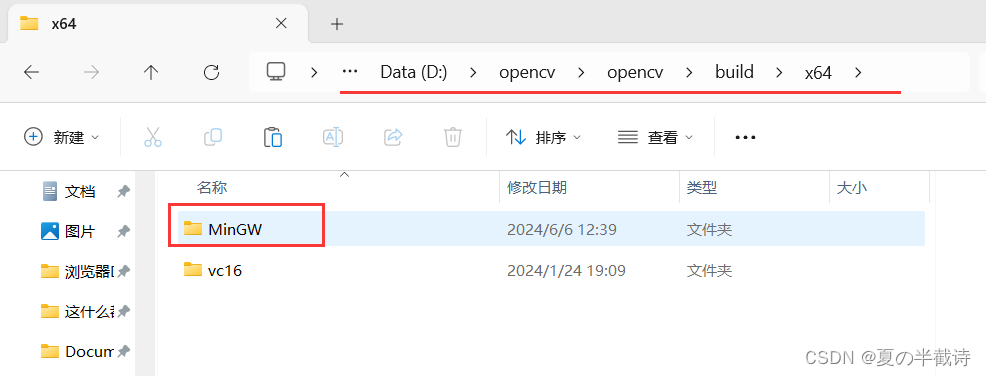
安装完OpenCV后,在 build\x64 路径下新建一个文件夹(可自起,这里是 MinGW )
5、生成MakeFiles
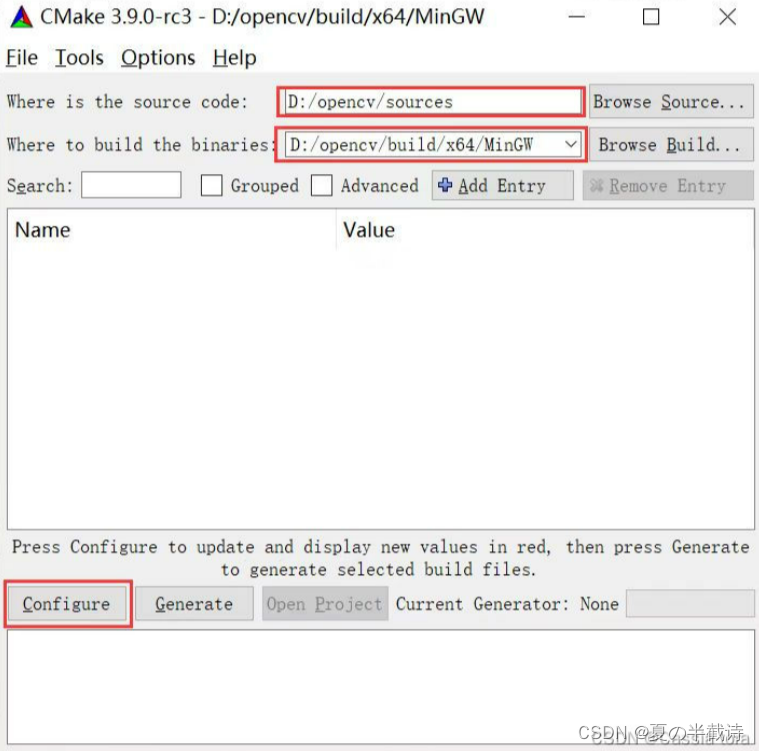
进入D:\cmake-3.29.4-windows-x86_64\bin :
打开cmake-gui,选择OpenCV的源文件路径和MakeFiles保存路径(即之前新建的MinGW):
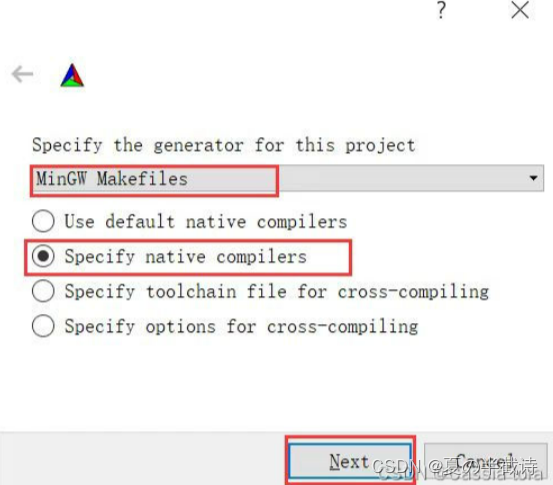
点击Configure,弹窗配置如下,点击Next:
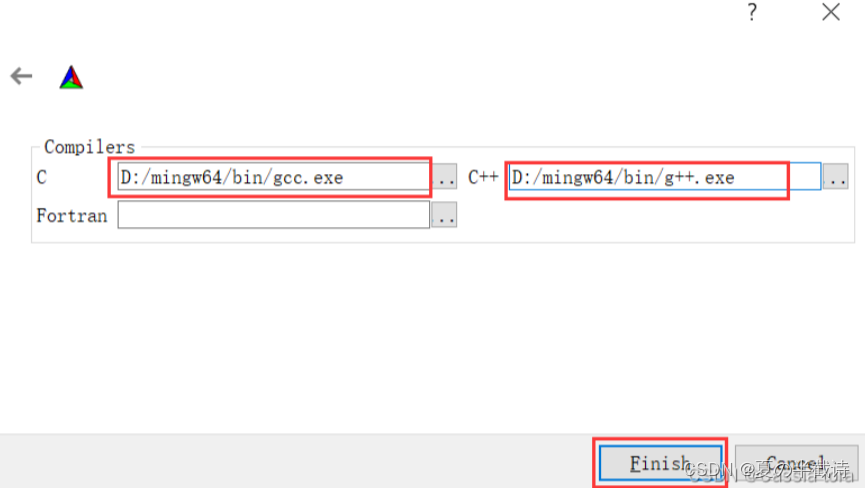
选择前面安装的D:/mingw64/bin文件夹下的gcc.exe和g++.exe,点击Finsh:
—>耐心等待中。。。
执行过程中消息框会出现一堆红色信息,最后显示Configure done,是正常的。</br>显示Configure done后,勾选BUILD opencv_world、WITH OPENGL和BUILD EXAMPLES,不勾选WITHIPP、WITH_MSMF和ENABLE_PRECOMPILED_HEADERS (如果有的话),CPU DISPATCH选空。再次点击Configure
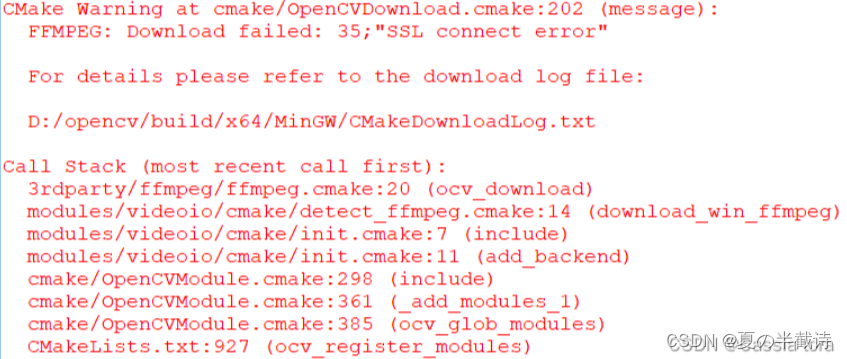
—>耐心等待中。。。</br>这次执行完后仍有错误如下:
由于网络问题(最好用梯子),仍然会有文件没有成功下载,这个时候需要手动下载它们。
在自创建的MinGW下的CMakeDownloadLog.txt文件中列出了所有丢失文件的下载链接,比如:
>
https://raw.githubusercontent.com/opencv/opencv_3rdparty/4d348507d156ec797a88a887cfa7f9129a35afac/ffmpeg/opencv_videoio_ffmpeg.dll
一个个访问这些链接,下载后放到OpenCV源文件里.cache的相应子文件夹中替代原缓存文件(下载的文件重命名为相应地缓存文件名并删除原缓存文件)。
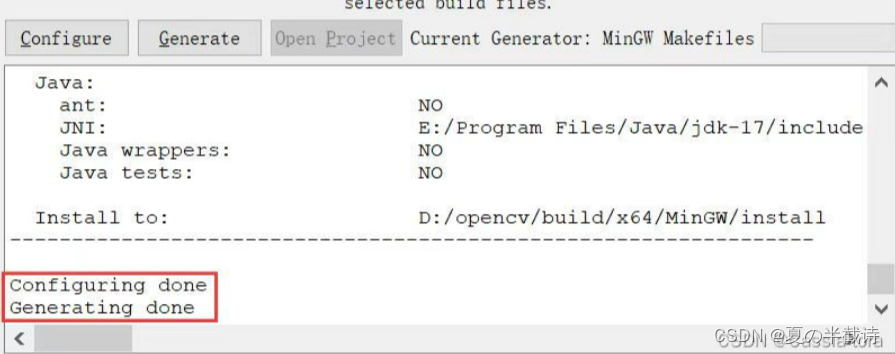
这样从头到尾下载CMakeDownloadLog.txt中列出的所有丢失文件,之后,再次点击Configure,出现configure down之后查看CMakeDownloadLog.txt文件,成功了显示下图:
之后点击Generate,显示Generate Done。
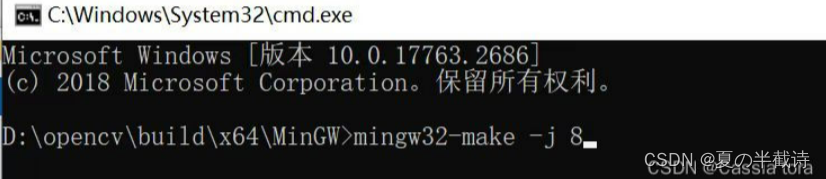
6、编译OpenCV
使用 cmake 时要求安装 python3(版本没有限制,比2高就行),并且python 必须配好了环境变量。cmd到MakeFiles所在文件夹([如何cmd](https://blog.csdn.net/weixin_42809924/article/details/104929103)),执行如下命令:
>mingw32-make -j 8
如果报错可查阅[编译报错解答](https://blog.huihut.com/2018/07/31/CompiledOpenCVWithMinGW64/),如果编译成功则执行如下命令完成装载:
>mingw32-make install

将D:\opencv\build\x64\MinGW\bin加到环境变量的系统变量中:

### 7、VS Code配置
#### (1)c_cpp_properties.json
1
2
3
4
5
6
7
8
9
10
11
12
13
14
15
16
17
18
19
20
21
22
| {
"configurations": [
{
"name": "Win32",
"includePath": [
"${workspaceFolder}/**",
"D:/opencv/opencv/build/x64/MinGW/install/include",
"D:/opencv/opencv/build/x64/MinGW/install/include/opencv2"
],
"defines": [
"_DEBUG",
"UNICODE",
"_UNICODE"
],
"cStandard": "c11",
"cppStandard": "c++17",
"intelliSenseMode": "windows-gcc-x64",
"compilerPath": "D:/VScode/mingw64/bin/gcc.exe"
}
],
"version": 4
}
|
1
2
3
4
5
6
7
8
9
10
11
12
13
14
15
16
17
18
19
20
21
22
23
24
25
26
27
| {
"version": "0.2.0",
"configurations": [
{
"name": "opencv4.9.0 debuge",
"type": "cppdbg",
"request": "launch",
"program": "${fileDirname}\\${fileBasenameNoExtension}.exe",
"args": [],
"stopAtEntry": true,
"cwd": "${workspaceFolder}",
"environment": [],
"externalConsole": false,
"MIMode": "gdb",
"miDebuggerPath": "D:/VScode/mingw64/bin/gdb.exe",
"setupCommands": [
{
"description": "为 gdb 启用整齐打印",
"text": "-enable-pretty-printing",
"ignoreFailures": false
}
],
"preLaunchTask": "opencv4.9.0 compile task"
}
]
}
|
1
2
3
4
5
6
7
8
9
10
11
12
13
14
15
16
17
18
19
20
21
22
23
24
25
26
27
28
29
30
31
32
33
34
35
36
37
| {
"tasks": [
{
"type": "cppbuild",
"label": "C/C++: g++.exe 生成活动文件",
"command": "D:\\VScode\\mingw64\\bin\\g++.exe",
"args": [
"-fdiagnostics-color=always",
"-g",
"*.cpp",
"-o",
"${fileDirname}\\${fileBasenameNoExtension}.exe"
],
"options": {
"cwd": "${fileDirname}"
},
"problemMatcher": [
"$gcc"
],
"group": {
"kind": "build",
"isDefault": true
},
"detail": "调试器生成的任务。"
}
],
"version": "2.0.0"
}
|
1
2
3
4
5
6
7
8
9
10
11
12
13
14
15
16
17
18
19
20
21
22
23
24
25
26
27
28
29
30
31
32
33
34
35
36
37
38
39
40
41
42
43
44
45
46
47
48
49
50
51
52
53
54
55
56
57
58
59
60
61
62
| {
"code-runner.executorMap": {
"javascript": "node",
"java": "cd $dir && javac $fileName && java $fileNameWithoutExt",
"c": "cd $dir && gcc $fileName -o $fileNameWithoutExt && $dir$fileNameWithoutExt",
"zig": "zig run",
"cpp": "cd $dir && g++ *.cpp -o $fileNameWithoutExt -I D:/opencv/opencv/build/include -L D:/opencv/opencv/build/x64/MinGW/bin -l libopencv_world490 -l opencv_videoio_ffmpeg490_64 && $dir$fileNameWithoutExt",
"objective-c": "cd $dir && gcc -framework Cocoa $fileName -o $fileNameWithoutExt && $dir$fileNameWithoutExt",
"php": "php",
"python": "python -u",
"perl": "perl",
"perl6": "perl6",
"ruby": "ruby",
"go": "go run",
"lua": "lua",
"groovy": "groovy",
"powershell": "powershell -ExecutionPolicy ByPass -File",
"bat": "cmd /c",
"shellscript": "bash",
"fsharp": "fsi",
"csharp": "scriptcs",
"vbscript": "cscript //Nologo",
"typescript": "ts-node",
"coffeescript": "coffee",
"scala": "scala",
"swift": "swift",
"julia": "julia",
"crystal": "crystal",
"ocaml": "ocaml",
"r": "Rscript",
"applescript": "osascript",
"clojure": "lein exec",
"haxe": "haxe --cwd $dirWithoutTrailingSlash --run $fileNameWithoutExt",
"rust": "cd $dir && rustc $fileName && $dir$fileNameWithoutExt",
"racket": "racket",
"scheme": "csi -script",
"ahk": "autohotkey",
"autoit": "autoit3",
"dart": "dart",
"pascal": "cd $dir && fpc $fileName && $dir$fileNameWithoutExt",
"d": "cd $dir && dmd $fileName && $dir$fileNameWithoutExt",
"haskell": "runghc",
"nim": "nim compile --verbosity:0 --hints:off --run",
"lisp": "sbcl --script",
"kit": "kitc --run",
"v": "v run",
"sass": "sass --style expanded",
"scss": "scss --style expanded",
"less": "cd $dir && lessc $fileName $fileNameWithoutExt.css",
"FortranFreeForm": "cd $dir && gfortran $fileName -o $fileNameWithoutExt && $dir$fileNameWithoutExt",
"fortran-modern": "cd $dir && gfortran $fileName -o $fileNameWithoutExt && $dir$fileNameWithoutExt",
"fortran_fixed-form": "cd $dir && gfortran $fileName -o $fileNameWithoutExt && $dir$fileNameWithoutExt",
"fortran": "cd $dir && gfortran $fileName -o $fileNameWithoutExt && $dir$fileNameWithoutExt",
"sml": "cd $dir && sml $fileName",
"mojo": "mojo run",
"erlang": "escript",
"spwn": "spwn build",
"pkl": "cd $dir && pkl eval -f yaml $fileName -o $fileNameWithoutExt.yaml",
"gleam": "gleam run -m $fileNameWithoutExt"
}
}
|
1
2
3
4
5
6
7
8
9
10
11
12
13
14
| #include <iostream>
#include <opencv2\highgui\highgui.hpp>
#include <opencv2\opencv.hpp>
using namespace std;
using namespace cv;
int main()
{
string path = "C:/Users/WCJ/Desktop/0402/01/0.bmp";
cv::Mat img = imread(path);
imshow("img",img);
waitKey(0);
return 0;
}
|
2、cmake编译Opencv出现ffmpeg_cmake手动下载后也无法使用问题
解决方法:cmake编译Opencv出现ffmpeg_cmake手动下载后也无法使用问题
非常好!!!
3、如何在cmd(命令提示符)中打开指定文件夹路径
解决方法:
总结:如何在cmd(命令提示符)中打开指定文件夹路径
Nice!!!
4、常规报错
Windows下Mingw+OpenCV的编译步骤以及问题记录
5、VScode报错:undefined reference to ……
解决方法:
(3)Code Runner的问题
VS code undefined reference to ‘xxx‘(容易被忽略的错误)
(4)头文件报错
【解决】VSCode编写C++自定义头文件undefined reference异常问题
真是离谱的报错。。。
6、无法在只读编辑器中编辑
解决方法:
vscode提示“无法在只读编辑器中编辑”解决方法
7、查看OpenCV版本
Windows查看opencv版本
8、JSON文件的配置
看看这两篇:
一文解决VS Code安装、C++环境配置、OpenCV配置
关于 Windows 下使用 VSCode 搭建 OpenCV 环境的问题
四、资料来源
五、原文链接
点击跳转


.png?raw=true)